These instructions are intended for IT professionals. They support the independent connection of Q.wiki to Microsoft Entra ID. If anything is unclear, instructions from Microsoft or Q.wiki support can help.
You need key user rights to perform the following configuration.
Table of Contents
- Recommendation and general information
- Linking Entra ID – Users and groups (SCIM provisioning)
- Linking the Entra ID - Single Sign-On with OIDC (Authentication)
- Select Authentication from the left-hand menu bar
Recommendation and general information
Limitations
- With Microsoft Entra ID, only individual users and groups can be synchronized; nested groups, i.e. groups within groups, are not supported.
- User provisioning via SCIM and user authentication via OIDC must be set up together, it is not intended to set it up seperately.
- Microsoft Entra ID cannot be configured together with other providers (e.g. LDAP). The manual creation and management of users is still possible and allows external users to be registered in Q.wiki.
- Only one Entra ID tenant may be connected.
- Each user must have a unique email address before Microsoft Entra ID can be connected. The configuration dialog in Q.wiki will indicate if this requirement is not met. The key user can change duplicate email addresses via the user administration in Q.wiki.
- For security reasons, all synchronized user data has a length restriction of 100 characters. Users who have a display name with more characters cannot be synchronized.
Migrating existing Topic/LDAP users
When connecting to Entra ID, existing Q.wiki users with a matching email address will be migrated. The migrated users will be updated with the data from Entra ID and from that point on will be managed by it.
Migrated users can log in using the “Use company login” button. It is no longer possible to log in with a user name and password.
Setting up an “emergency account”
Should there be a malfunction on the part of Entra, or the secret token expire, login will only be possible via users manually created in Q.wiki. For this reason, it is recommended to add a manually managed account to the key user group. This account must have a valid email address and must not be provisioned via Azure; an impersonal email address such as “service@”, “it-support@” is recommended. If the key has already expired, please read the following article: 401 Unauthorized error message when logging in
Open up Q.wiki and login with a KeyUser account to prevent locking out yourself.
1. Linking Entra ID – Users and groups (SCIM provisioning)
- Create a new Enterprise Application in Microsoft Entra ID. Caution! It is important to start the process by creating a new Enterprise Application!
- Start Create your own application.
- Enter the name of the app and select Non-gallery.

- Choose Create
- Choose Provisioning
- Choose Get started
 7. Set Provisioning Mode to Automatic
8. In Q.wiki, switch to User Management via the Tools menu and select Configure Provisioning in the 3-dot menu
9. Copy the Tenant URL from the dialog into Entra ID and generate a secret
 10. Click on Test Connection and save after a successful connection.
11. Activate group provisioning under Mappings.
 12. Under Settings and Notification Email, enter the details of the person responsible who should be notified in the event of synchronization problems.
13. For Scope, the option Synchronize assigned users and groups only must be explicitly selected. (if the item is present)

14. Set the provisioning status to On and save.
15. Users and groups are added under Users and groups. If all users are to be provisioned, the All Users default group can be used. Caution: Groups are only an option if users have an updated Azure Active Directory P1 or P2 tenant. The default AD plan level only allows individual users to be assigned to the application.
 After 40 minutes at the latest, the users in Q.wiki are synchronized.
You can continue with step 2 immediately; synchronization runs in the background.
2. Linking the Entra ID - Single Sign-On with OIDC (Authentication)
When setting up SSO with OIDC, the provisioned users are automatically logged on to Q.wiki if they have already been authenticated to Entra or Microsoft 365. If not, the user is automatically redirected to the Microsoft 365 sign-in with the company policy for 2-factor authentication.
1. In Q.wiki, access user administration under key user tools.
2. Connect the Entra ID via the three-dot menu Identity Provider (IdP)

 3. In Entra ID, create a new app registration.
 4. Select All applications and choose the application you created earlier for Q.wiki.
 5. Copy the application (client) ID and directory (tenant) ID and enter them in the configuration dialog in Q.wiki.
 6. Select Authentication from the left-hand menu bar.
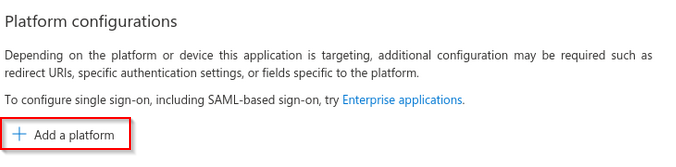
Select "Add a platform"
 Select "Web"
7. Copy the Redirect URI from the Q.wiki configuration dialog and enter it here.
 8. Click Configure, select Certificates & secrets.
9. Click New client secret, enter description, click Add.
Copy the value of the generated secret and paste it into the Q.wiki configuration dialog.
Attention: Please make sure to copy the value and not the secret ID.

10. Click Save in the Q.wiki configuration dialog.
11. Select API permissions.
- Click Add a permission.
- Select Microsoft Graph.

- Select Delegated permissions.
- Under OpenId permissions, select email, openid, and profile.

- Add a permission klicken.
- Grant admin consent klicken und mit Yes bestätigen.
12. From now on, provisioned users should be automatically logged in to Q.wiki.
Was this article helpful?
That’s Great!
Thank you for your feedback
Sorry! We couldn't be helpful
Thank you for your feedback
Feedback sent
We appreciate your effort and will try to fix the article